MO-100 Real Exam Questions

Microsoft Word (Word and Word 2019)

35 questions available · Page 1 of 4

Updated Exam DumpsVerified AnswersPass Guarantee

Get Complete Exam Dumps
Question 1 Lab simulation

Simulation

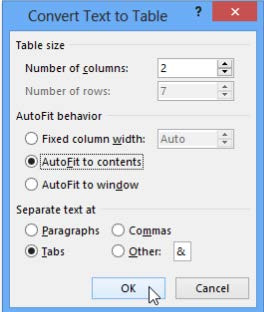
In the "Banking Fees" section, convert the tab-delimited text to a two-column table. Accept the default AutoFit behavior.

Show answer and explanation

Click the Insert tab and click Table in the Table section. Select Convert Text to Table from the drop-down menu.
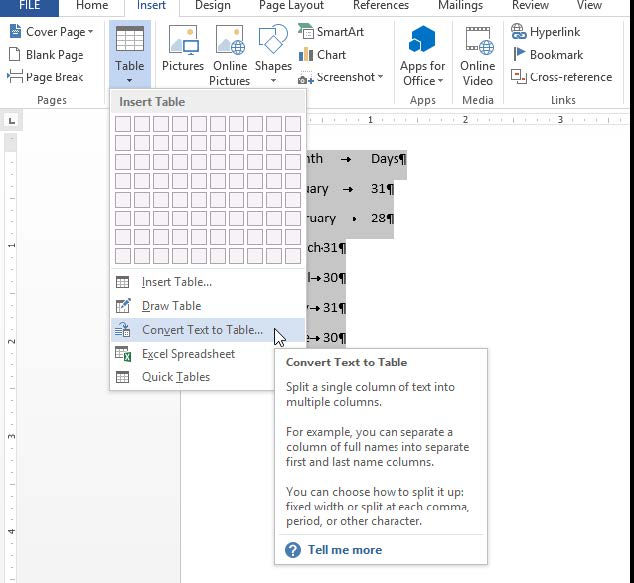
On the Convert Text to Table dialog box, the Number of columns should already be set to 2 if you have only one tab between each item on each line. The Number of rows is automatically calculated.
Question 2 Lab simulation

Simulation

You are preparing a brochure for Southridge Video. You plan to distribute the brochure electronically and in print.
Apply the centered style set to the document.

Show answer and explanation

On the Design tab, point to one of the style sets in the Style Sets gallery in the Document Formatting group.
The new style set is previewed in your document's existing text.
Click the style set you want.
If you don't like any of the choices displayed, click the More button for the gallery to open the full gallery of choices. Notice that you can reset to the default style set from this gallery menu, or save the current settings as a new style set.

Question 3 Lab simulation

Simulation

In the ''Top Sellers'' section, continue the numbering of the list at the top of the second column, so the list items are numbered from 1 through 6.

Show answer and explanation

Select the second column and insert number

Question 4 Lab simulation

Simulation

This project has only one task.
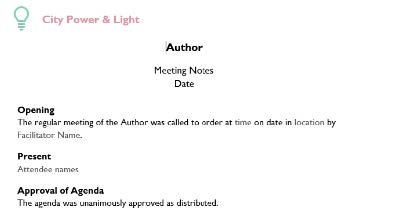
You have been assigned the task of keeping meeting, notes for your company's Board of Directors.
Save a copy of the document as a Word 2019 template named "Notes" that is compatible with the latest Word features and does not support macros. Save the template file in the default location.

Show answer and explanation

1. Open the Word document that you want to inspect for hidden data and personal information.
2. Click the File tab, click Save As, and then type a name in the File name box to save a copy of your original document.

3. In the copy of your original document, click the File tab, and then click Info.
4. Click Check for Issues, and then click Inspect Document.
5. In the Document Inspector dialog box, select the check boxes to choose the types of hidden content that you want to be inspected.
6. Click Inspect.
7. Review the results of the inspection in the Document Inspector dialog box.
8. Click Remove All next to the inspection results for the types of hidden content that you want to remove from your document

Question 5 Lab simulation

Simulation

Inspect the document and remove all headers, footers, and watermarks that are found, Do not remove other information.

Show answer and explanation

From the Info pane, click on Check for Issues and then select Inspect Document from the pop-up menu.
When the Document Inspector dialog box appears, uncheck all boxes except Headers, Footers, and Watermarks. Click on Inspect. Simply click on Remove All to delete all headers, footers and watermarks in your document

Question 6 Lab simulation

Simulation

In the blank paragraph after the document title, insert a table of contents. Use the Automatic Table 1 style.

Show answer and explanation

References:
TABLE OF CONTENTS - TC option - Automatic Table 1

Question 7 Lab simulation

Simulation

Set the line spacing to 1.4 lines for the entire document.

Show answer and explanation

1. Select the paragraphs you want to change.
2. Go to Home > Line and Paragraph Spacing.
3. Choose the number of line spaces you want or select Line Spacing Options, and then select the options you want under Spacing.

Question 8 Lab simulation

Simulation

In the ''Basic dinosaur facts'' section, apply the Pencil Sketch artistic effect to the fossil picture.

Show answer and explanation

1. Select the picture.
2. Select Picture Tools > Format and select Artistic Effects.
3. Hover over the options to preview them and select the one you want.

Question 9 Lab simulation

Simulation

In the ''Geologic eras'' section, sort the table data by ''Geologic period'' (Ascending) and then by
''Dinosaur'' (Asending).

Show answer and explanation

Select a cell within the data.
Select Home > Sort & Filter. Or, select Data > Sort.
Select an option: Sort A to Z - sorts the selected column in an ascending order. Sort Z to A - sorts the selected column in a descending order.

Question 10 Lab simulation

Simulation

In the ''Event Package'' section, insert a footnote to the right of the heading. Enter the footnote text
''Includes digital files.''

Show answer and explanation

Click where you want to reference to the footnote or endnote.
On the References tab, select Insert Footnote or Insert Endnote.
Enter what you want in the footnote or endnote.
Return to your place in the document by double-clicking the number or symbol at the beginning of the note.

Testlet 1

Topic 7, City Power & Light